Post by ponyta on Feb 2, 2015 1:22:44 GMT
NOTE: This thread has been resurrected from the old OLF.
I was able to do this because I had saved my HTML code. I am crafty that way!
All this information was written between 2008 to 2012.
Keep in mind that when I began refurbishing these vintage decks, Penny did not even exist!
There is a ton to read here, so make yourself a cup of coffee or tea, sit down and enjoy the reading!
Email me at ponyta (at) rogers (dot) com if your have questions.
MAKAHA banana board
from the 70's - refurbished!
a photo essay by Ponyta
I was recently given two old Makaha banana boards by the props department at the TV station I work at because it was decided that the old 70's boards would no longer do. I mean, what kid today would realistically recognize them as skateboards anyway?
Skateboards have really mutated over the years, plus they were in terrible shape and a liability as props. They were offered to me because I am the resident skater which I am at once proud of and embarrassed by. But I digress...
So I took in these unwanted decks which were filthy like they had been ridden in mud, not knowing if I could really do anything with them. It then occurred to me, once I got home, that I could probably make ONE good board out of both of them. Plus, I had a soft spot for them, having first learned to skate on a similar skateboard a long time ago.
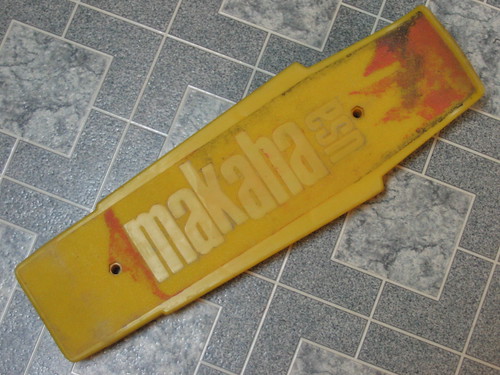
I first washed everything and decided this crappy yellow deck was beyond repair and quickly tossed it into the garbage:
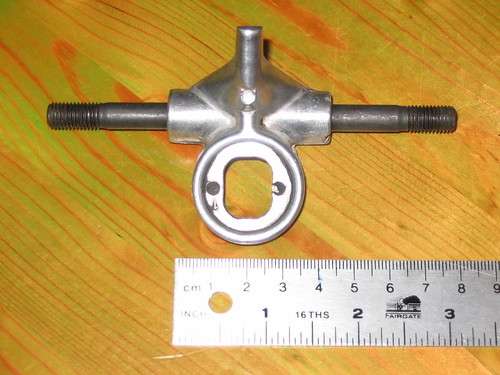
BUT I kept it's pivot bushings and amazingly tiny 45mm (!) hangers:
After giving everything a good cleaning, I replaced the gross, disintegrating bushings and corroded washers:
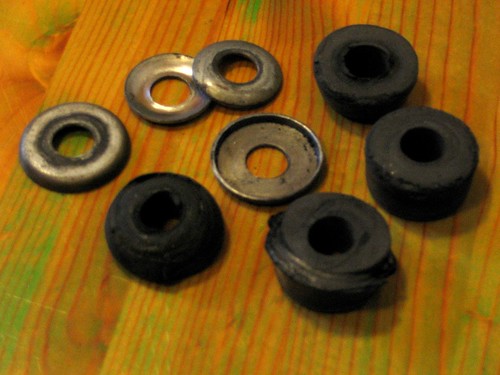
And I bought Tracker bushings because I thought they'd be the closest to fancy bushings available back then:
Then I had the idea of cleaning up the trucks further with Bull Dog brand steel wool...
... carefully polishing in circles to make sure I didn't get any scratch marks. What a difference it made! I did find out the hard way why it is highly suggested on the box to wear gloves when working with steel wool, as I nearly sliced off the tip of my finger when separating a ball of steel wool into two pieces. OUCH! My finger hurts as I type this. Beware the steel wool, I say!
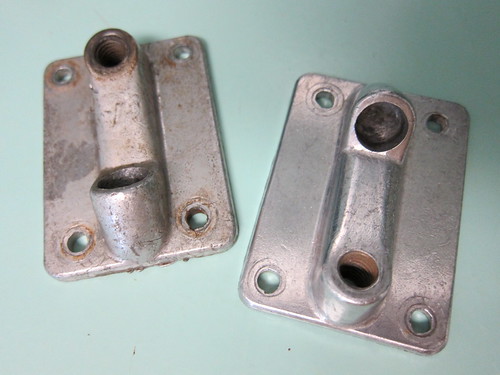
Still, it was worth it. Here is a polished baseplate and one cleaned only with water. Nice, huh?

Notice something different about the baseplates? Mmmhmmmmmm... More on them later.
Because I like my skate equipment fancy, I replaced some of the corroded hardware with new stuff that I puchased at the local hardware store but learned the hard way when I got home that sizes vary slightly and it is easier to get this stuff at a skate shop. Some stuff fit but I still need to replace the bolts and axle nuts.
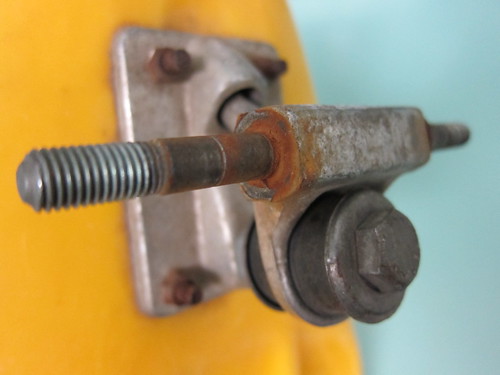
Because I began with two Makaha boards, I had a choice of two hangers to work with:
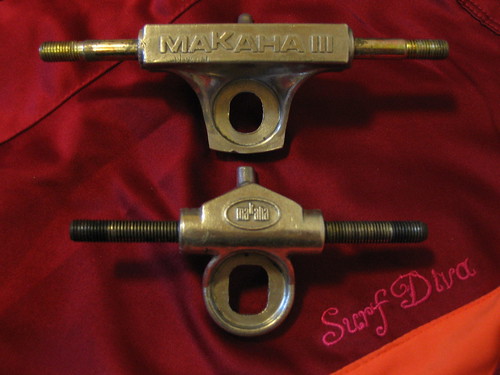
Notice how this small hanger is threaded all the way, whereas the one pictured above with a ruler isn't. Strange.
I chose to install the wider Makaha III 75mm hangers, but will be checking out the narrower ones soon just for fun. It is unclear which board came with which hangers and I suspect they were switched around at some point (the decks were originally owned by a brother and sister) because the wider hangers were on the narrower orange deck and the narrower ones were on the wider yellow deck.
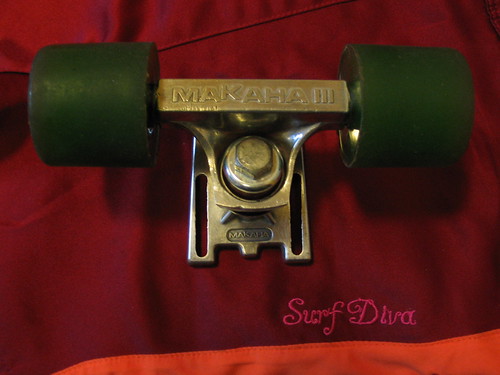
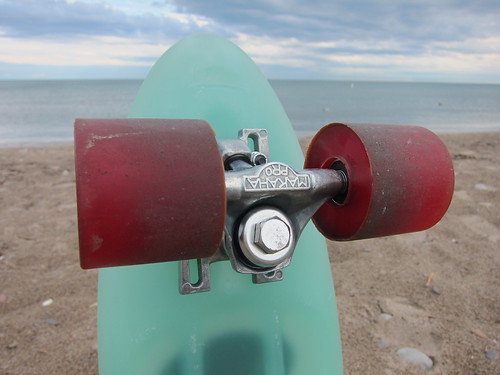
I was pleased to realize that the axles on these Makaha trucks are 8mm just like on new trucks which means I can put most present-day wheels on this banana board which is way cool.
The Makaha 2 green urethane wheels are tiny, measuring only 45 mm and have closed bearings built-in (which is an upgrade from the clay wheels I had as a kid with their nasty open bearings). Cool to look at, but they are really slow to ride because the built-in bearings are a little wobbly and the wheels are very soft. Still pretty cool to get a feel for the urethane that people used to ride THIRTY years ago. I have an extra set of four of these wheels (see photo below) that I *might* be willing to part with if you are a tweaker and would give them a loving home on your own banana board. I bury this fact in this long post because I wanna make sure that only a crazy board-builder/skate fetishist/collector type would read it. Who else would actually read such a long post? These wheels are not really meant for riding anyway. Wobbly.
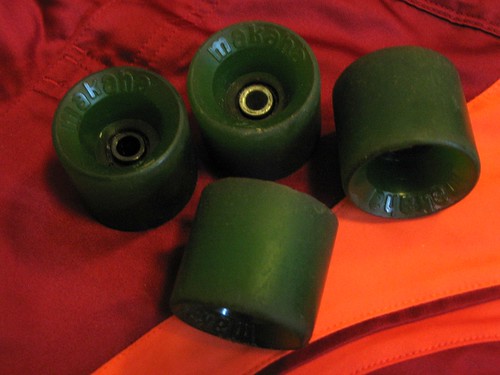
So cute! They remind me of tiny little ABEC Flashbacks.
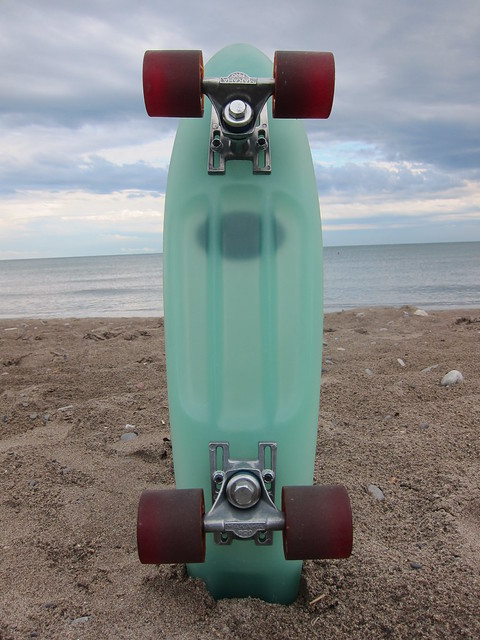
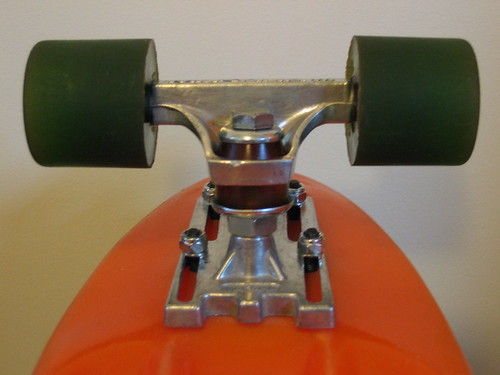
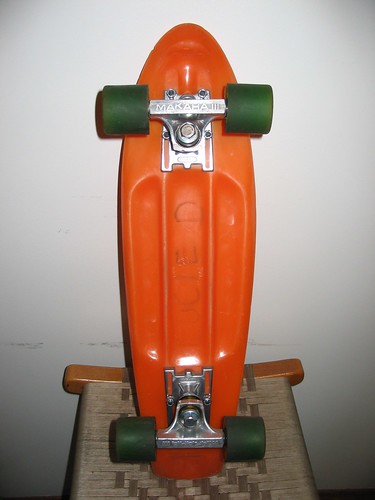
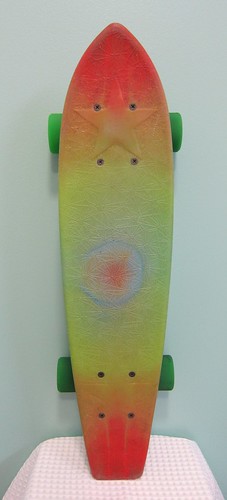
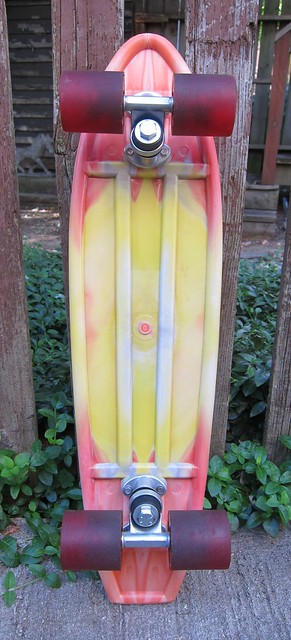
So... in the end, I have a gorgeous popscicle orange banana board in my quiver now, a board with a kicktail (woo-hoo!) which my first skateboard did not have.
Notice how the baseplates allow you to shorten or lengthen the wheelbase. Interesting!
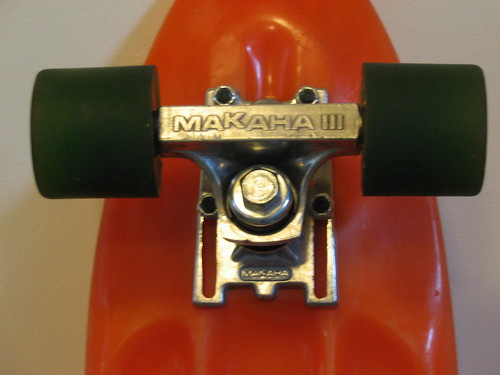
If you are thinking of getting a set of trucks off a banana board, note that they are drilled "no-school" - a term I made up meaning neither old-school nor new school - so you would need to drill more holes on your deck to install them, or build your own deck from scratch.
Here is a photo of my orange popsicles, in varying sizes, just to make you laugh.

I <3 SKATEBOARDS.
Ponyta

THIS BANANA BOARD FOUND A HAPPY NEW HOME IN FEB 2015.
P.S. Here's a photo of yer old school grip, built into the deck! LOL
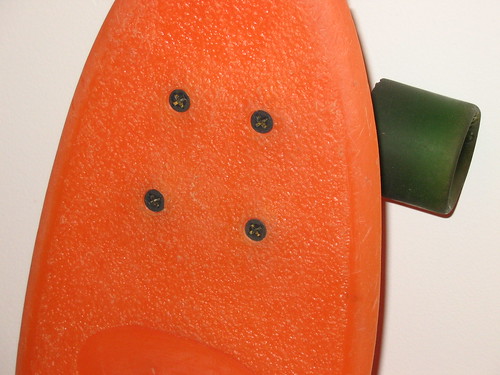
I think black grip tape only came along later in the early eighties, but I may be wrong. That's when I began seeing it in sporting stores.
My deck is 22 inches long. Many of these decks had no visible brand.
By the way, I also took a sanding sponge with fine grit to the sides of the deck and smoothed down the rough edges which makes it nicer to carry.
Okay. I need to go get a life now. Or at least get some sleep.
Doesn't it seem like everything was orange in the 70's?
Important note on working with steel wool:
Polishing with steel wool creates a million little bits of steel which will fall to your workbench/floor. These nasty leftovers can get under your skin and really hurt.
Pick them up with a vaccuum cleaner or, better still as I found out by coincidence, with a screwdriver with a magnetic tip!
Keep your old toothbrushes!
I am refurbishing a few boards and must add that OLD TOOTHBRUSHES are so handy when attempting to remove 30 year-old grime and dirt from small metal parts!

After my first banana board restoration, I was hooked! So I looked for old banana boards and managed to find a few...
THE BACK STORY...
The next two vintage decks were both in TERRIBLE shape when I first got my hands on them.
In fact, I thought I paid too much when I realized that I couldn't take the trucks or mounting bolts apart due to really bad corrosion and rust. It was also apparent that previous owners had tried to do the same - one kingpin was actually a little crooked. I searched the internet and came across some great info on the Art of Skateboarding website, i.e. that dunking the whole truck in a bucket full of malt vinegar (!) for several hours might help pry metal parts apart. It took patience and determination, but eventually it worked and the king pins budged and I was able to take the trucks apart. I also had to saw off a few truck bolts!
CLASSIC YELLOW BANANA BOARD
with red wheels
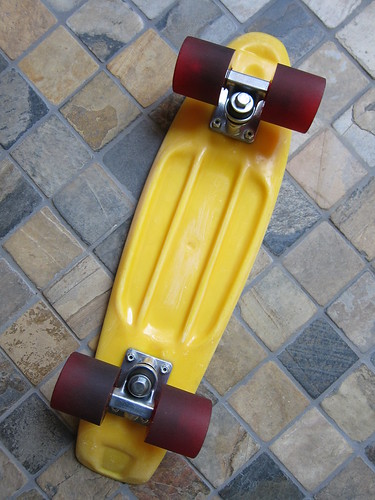
Vintage plastic deck and vintage trucks (after lots of polishing)
Truck before restoration
Baseplates before and after polishing with SOS pads
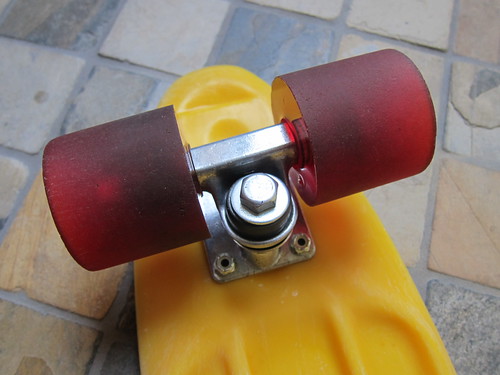
Closeup on front truck
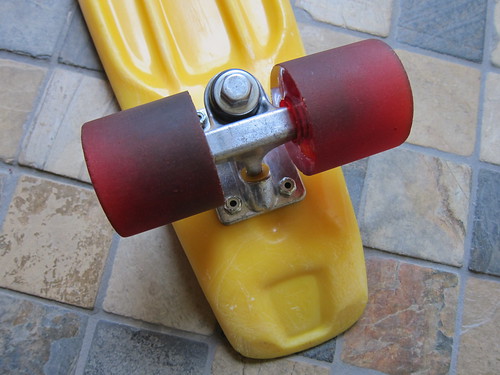
Closeup on back truck - notice NOS old-school yellow pivot cups purchased on ebay
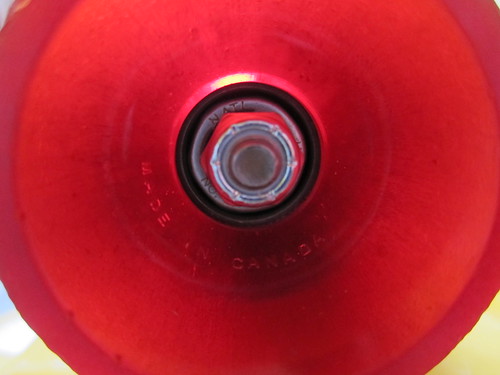
Vintage 55mm urethane wheels with "Made in Canada" inscription

Vintage "caged" bearings - I'd never seen these before
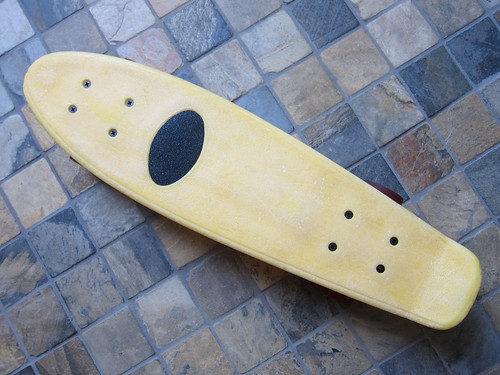
Oval grip tape added for performance and style!
Also: All-new king pins & lock nuts, truck bolts & nuts, axle nuts and speed rings.
THIS BANANA BOARD HAS FOUND A HAPPY NEW HOME.
RED STONE FIBERGLASS
BANANA BOARD
w/gorgeous amber wheels!
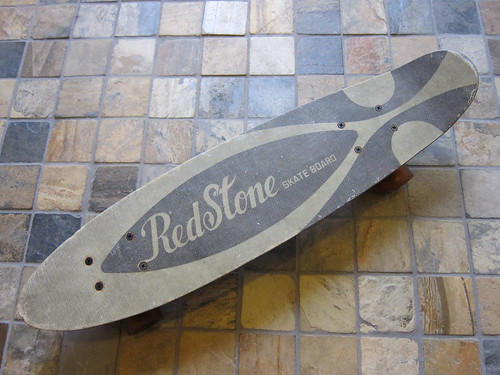
Vintage Red Stone fiberglass deck
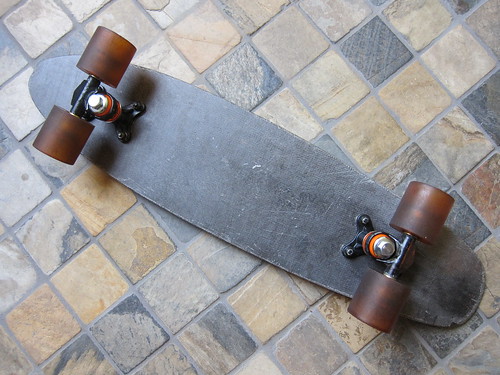
Vintage black trucks with 45mm urethane wheels - these are slow!
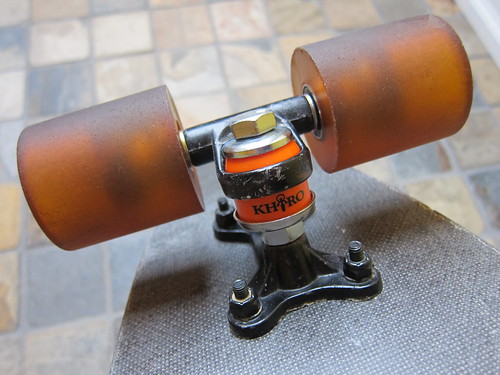
NOS old school bushing cup, new school bushing cup
and new orange Khiro bushings for performance and style! Hahaha...
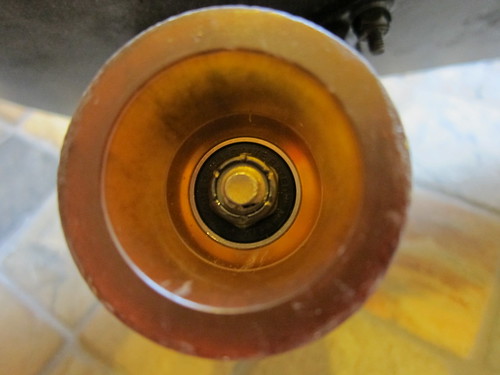
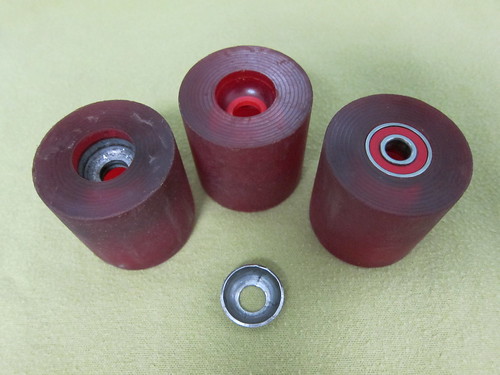
The metal cups that were holding the loose ball bearings were popped out
and new Mini logo precision bearings were installed with bearing spacers
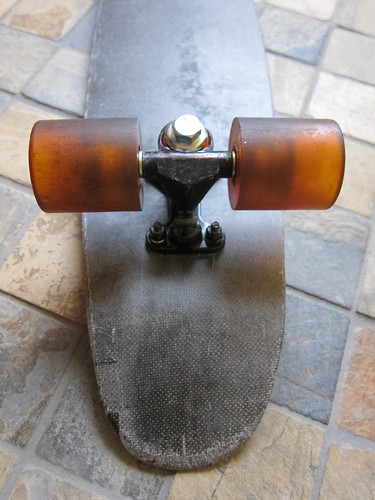
NOS old school amber pivot cups purchased on ebay
Also: All new king pins & lock nuts, truck bolts & nuts, black axle nuts and speed rings.
THIS BANANA BOARD FOUND IT'S FOREVER HOME IN FEB 2015.
Question: What does a grrrl do on sad, rainy days?
Answer: Tinker with skateboards.
SO YOU WANNA BE A STAR SKATER?
This is my latest banana board project. It's been many months in the making.
When I first came across this deck, it had good wheels and bad wheels.
I tossed out the bad and used the good to experiment and find out
if it was possible to transform a wheel with loose ball bearings into
a wheel with precision bearings. I had nothing to lose.
Conclusion?!?
It can be done... sometimes... depending on the wheel.
Instructions: Pop out the metal cups that hold the loose ball bearings in place and install the precision bearings along with the all-important spacers. For that lesson alone, I am so grateful to this little banana board.
I did this mod to two of my other banana boards (Makaha and Red Stone).
Of course, I still had to find a full set of wheels for this puppy.
I didn't get around to finishing this "STAR" deck in time for SWAP MEET, but now I am glad because after finishing up this deck on the weekend, I went riding in my neighbourhood and it was a great old school timewarp. So it will remain in my quiver!
I bought a set of no-name mini trucks when I was down in Miami Beach and was unsure how to go about mounting them onto the deck.
As you can see, the deck was pre-drilled for many options.
Unfortunately, the new school holes were a little off. What to do?
I decided to forget the hexagonal screws and drill right through the deck.
Now we were definitely leaving restoration and going into "mod" territory.
For this, I called Ted and Norah at ROAROCKIT.
I was invited to drop by for a visit and Ted took care of it for me. He drilled the two first holes, bolted the truck in place, and then drilled the two other holes using the truck holes as a guide. It worked like a charm. Many thanks for your generosity, Ted and Norah!!!

Next question was what kind of wheels I was going to put on it.
I tried a set of Gumballs lathed down to 50mm by Hev.
Looked pretty good...
... but it was a little too slow when I rode it, so I bought a used set of 3dm Cambria 62mm wheels from Nakedlongboarder...
... swapped out the cheap hard plastic bushings for soft Thunder bushings AND... found that it rode like a charm.
Couldn't resist jamming the culture and adding a Green Banana Co. sticker which I carefully cut out.
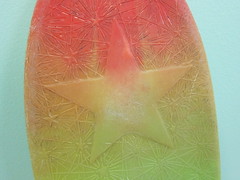
You gotta love the stars that act as grip!
I gots one more banana board I am working on. Stay tuned...
Thanks for all the kudos, everyone! This work is actually very therapeutic for me.
Some people knit. Others do yoga. I tinker with skateboards.
MANY MORE PHOTOS:
www.flickr.com/photos/ponyta/sets/7215762637619
A blue wave has taken ahold of my soul. I must ride it out...
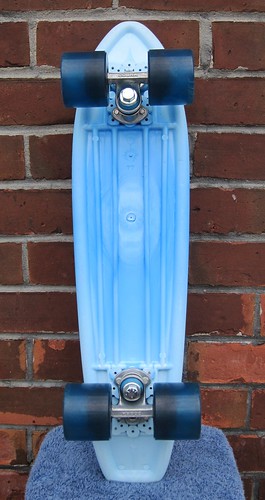
BLUE WAVE
This is my latest banana board project. Not a restoration per se, but more of a re-thinking.
Like the last one, it was several months in the making.
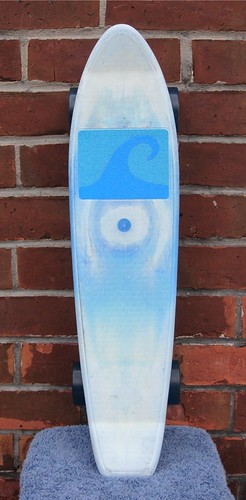
When I first got my hands on this skateboard, it was in nice condition.
It featured the mysterious remnants of a sticker on top. Took my eyes a long while to fill in the gaps and figure out what it used to read.
Can YOU make it out?
(The answer can be found at the bottom of this post.)
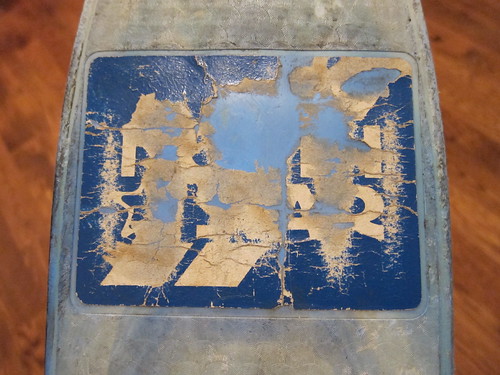
Funny how so many of these old banana boards featured stickers placed right exactly where skaters put their front foot! No wonder few of these boards can be found with the original stickers intact. Ridiculous...
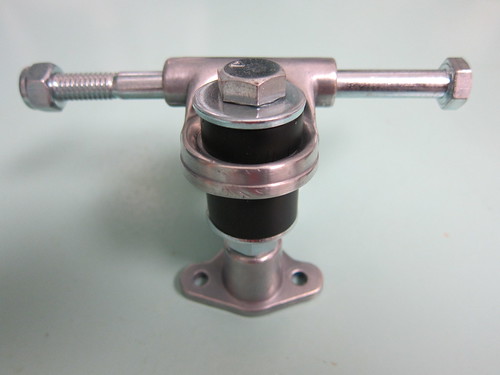
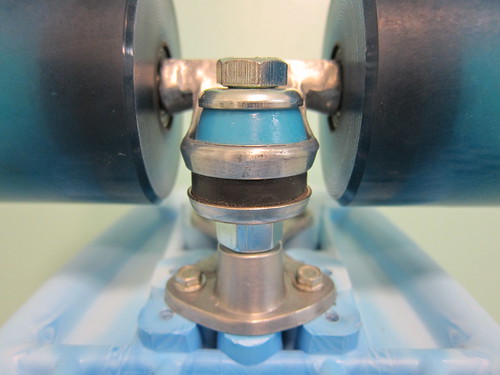
Notice anything strange about this truck?
When I took the trucks apart, I was surprised to find there were no axles. Instead of an axle, each truck had a long bolt going all the way through.
I bought old axles from a Silverfish skater/collector and tried to install them in place of the bolts, but was unsuccessful. The axles were a tad too wide.

So I "borrowed" these Cobra trucks off the Star banana board (on which I ended up installing new mini trucks - see my previous post).
Of course, I polished up the trucks with SOS pads to make them shine (HOURS and HOURS) and the old hardware was all swapped out for shiny new hardware.
I decided to keep the tiny hexagonal screws holding the trucks in place.
Drilling through the deck would have meant the holes would've ended up where the sticker was, and I did not want to ruin the look of the deck.
Besides, I had plans to create some cool custom grip for that space!
Next, I posted a "Blue Grip Tape Wanted" thread in OLF's Buy/Sell/Trade and two people saved the day: boomboom and The Karama Kidd.
Suddenly, I had two different shades of blue. What to do?!?
Next question was what kind of wheels I was going to put on it.
That was the easiest part. In keeping with the blue theme...
... I chose a set of blue 63mm Tunnel Rocks which I already owned and topped the whole thing off with blue Tracker top bushings bought off ebay.
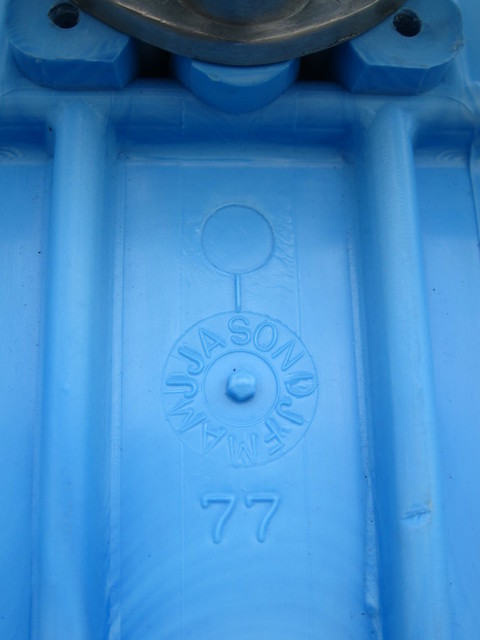
This cryptic info on the deck is probably meant to offer insight on who made the board and when. I guess 1977 is the year it was made.
Last week, I got my hands on another banana board.
So stay tuned to this channel...
* ANSWER: NORTH STAR 77
P.S. I'm guessing it was made in Canada. The other clue is that the red wheels that
were originally on the board when I got it had "Made in Canada" written on them
and the trucks were attached with Robertson screws - a Canadian invention.
the letters above the 77 are the letters of all the months
Ahhh... and I thought some guy called JASON had something to do with it. ;D
That makes sense now. I bet the months were on a dial that could turn.
My guess is the production date was September 1977, the S being on the mark at top.
THIS BANANA BOARD FOUND A HAPPY NEW HOME IN FEB 2015.
HOW DO YOU DO A RESTORATION?
You will need time, patience and the right tools!
The first thing I need to know is when you write about the screws, I am assuming you mean the four bolts that go right through the plastic deck and hold the truck in place with four nuts (see my Red Stone banana board as an example), right?
Or do you mean the little screws that hold the truck in place by fastening it to the plastic deck (see Blue Wave banana board)?
I am going to assume we are talking about bolts. To do the job, you will want to use locking plyers*, a Phillips head screwdriver (assuming the bolts have an X on top) and a little hacksaw that cuts through metal (you can get one for about $6 at any hardware store).
Clamp the plyers onto a rusty nut. Put the screwdriver into the head of the bolt to hold it in place and then turn the plyers counter-clockwise.
You will find that:
- the nut will break off because it is so rusty,
- or you can turn the nut a little and then simply remove it with your fingers,
- or you can turn the nut a little, but then it won't budge.
If you can turn it even a little, you now have clearance to access the bolt and cut it with a hacksaw. Be patient. This will take at least 15 to 20 minutes of sawing. Once it is cut, poke the rest of the bolt out with a nail. Do this to all bolts until you can remove both trucks.
Now the KINGPIN... this is harder. If you find you cannot turn it at all, then I suggest you dunk the truck in a bucket of MALT VINEGAR. I learned this method by reading a post on the Art Of Skateboarding website. After a few hours, the vinegar eats away at the rust and the kingpin may begin to loosen. Fasten the truck back onto the deck (with new hardware), as this will make it easier to remove the kingpin because you'll have the deck to hold onto. With a bit of muscle, you should be able to take it out. Do this with real tools, not a skate tool. Real wrenches will give you more torque.
If the kingpin still won't budge, then I have another system, but it is more complicated, so try this first and get back to me. Alternately, I am willing to help you out in person, if you prefer.
Once you have taken everything apart, you can clean everything up, polish up the trucks with SOS pads, install new kingpins (make sure you buy the right thread that will fit in baseplate), install modern day bushings and turn your banana board into a shiny little hotrod.
Most importantly, HAVE FUN!
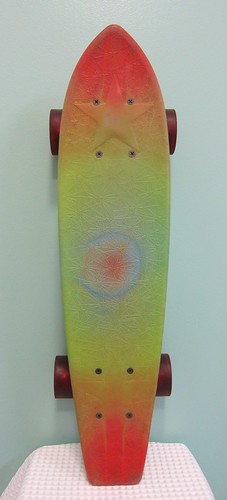
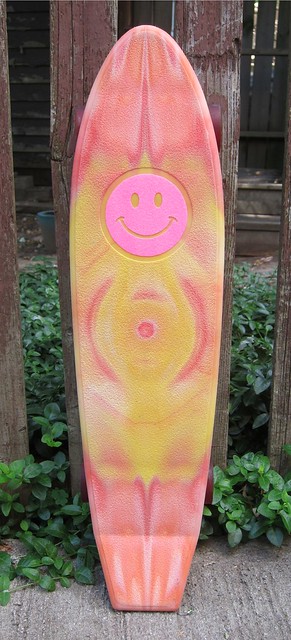
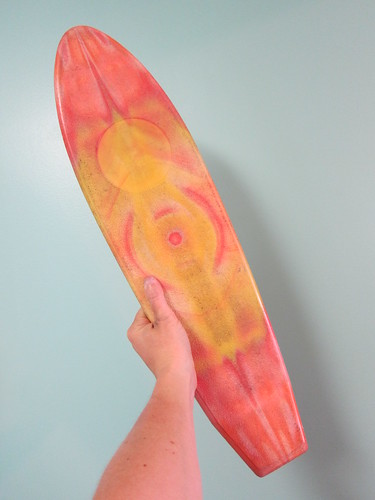
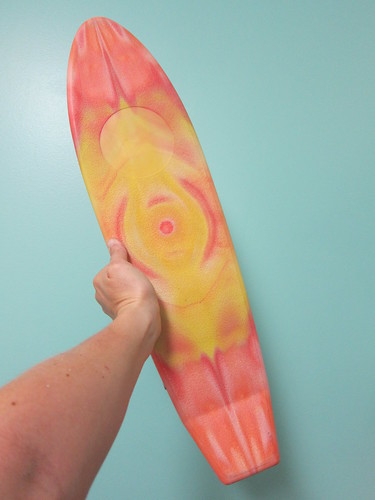
This one is an ode to a bright and happy future...
SMILE!
Bought this board on my birthday for 40 buckaroos which is more than I've paid for any banana board so far.
I was inspired by the bright tie-dye colours and really needed the positive vibes.
When I began restoring it, I found out the trucks were completely seized up.
So I took them off the deck and dunked them in a bucket of malt vinegar which eventually helped loosen them enough for me to take everything apart. I am sure the seller would be quite surprised that I was able to salvage it. It was obvious that he had tried in vain...
Here are the other steps I went through to restore it:
- washed the deck with a thick bristled brush
- scraped the edge of the deck lightly with a sharp blade to remove nicks and dirt
- lightly sanded the edge of deck with fine sandpaper
- polished both trucks with SOS pads to restore shine
- polished bottom bushing cups
- replaced top bushing cups with washers
- replaced the old kingpins and nuts with a shiny new Khiro set
- gave the bushings and wheels a good scrubbing to remove dirt and grime
- removed loose ball bearings and installed new Mini Logo sealed bearings
- installed bearing spacers and speed rings
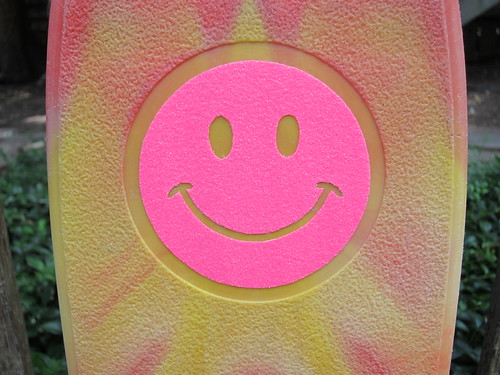
- created custom smiley face grip tape for fun and functionality!
Please note that the photos don't quite capture how bright the deck's colours are.
Deck before and after:
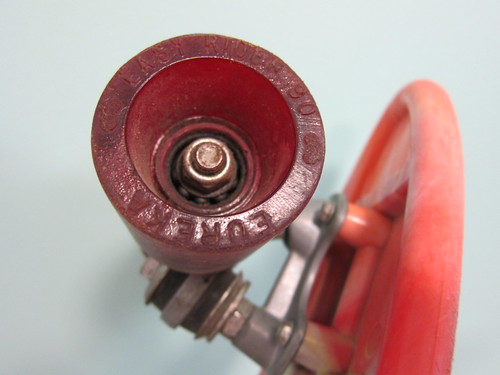
Front truck before restoration:
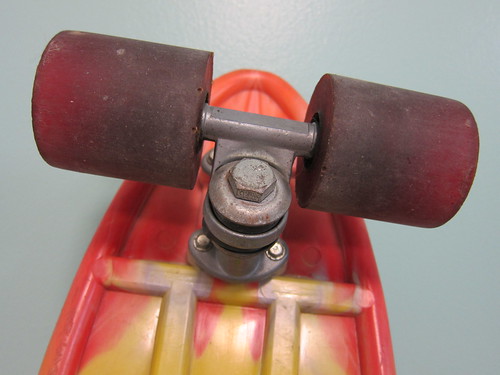
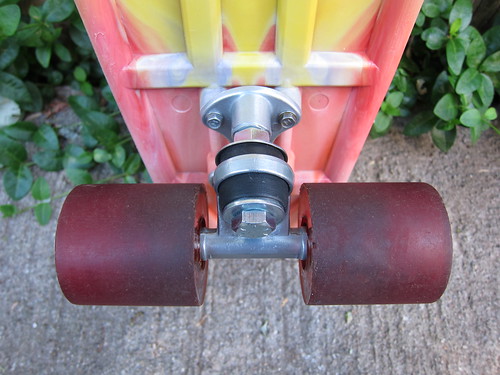
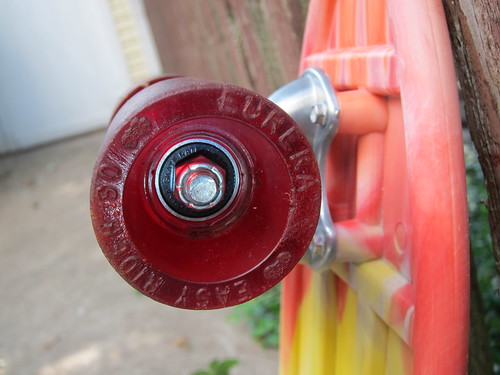
Front truck after polishing and with new hardware:

Back truck before restoration:
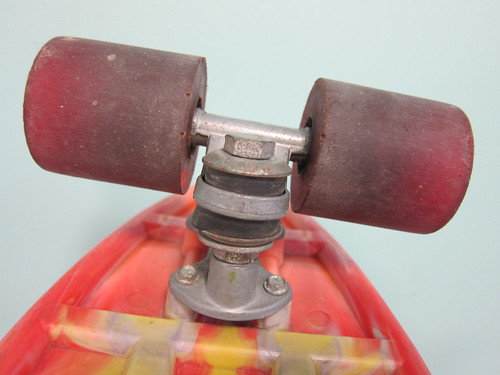
Back truck after polishing and with new hardware:
Custom smiley face grip tape:
Wheel before with open bearings:
Wheel after with sealed bearings:
^ Notice the cute little bicycles on the edge of the wheel - weird, eh?
THIS BANANA BOARD HAS FOUND A HAPPY NEW HOME.
I was able to do this because I had saved my HTML code. I am crafty that way!
All this information was written between 2008 to 2012.
Keep in mind that when I began refurbishing these vintage decks, Penny did not even exist!
There is a ton to read here, so make yourself a cup of coffee or tea, sit down and enjoy the reading!
Email me at ponyta (at) rogers (dot) com if your have questions.
MAKAHA banana board
from the 70's - refurbished!
a photo essay by Ponyta
I was recently given two old Makaha banana boards by the props department at the TV station I work at because it was decided that the old 70's boards would no longer do. I mean, what kid today would realistically recognize them as skateboards anyway?
Skateboards have really mutated over the years, plus they were in terrible shape and a liability as props. They were offered to me because I am the resident skater which I am at once proud of and embarrassed by. But I digress...
So I took in these unwanted decks which were filthy like they had been ridden in mud, not knowing if I could really do anything with them. It then occurred to me, once I got home, that I could probably make ONE good board out of both of them. Plus, I had a soft spot for them, having first learned to skate on a similar skateboard a long time ago.
I first washed everything and decided this crappy yellow deck was beyond repair and quickly tossed it into the garbage:
BUT I kept it's pivot bushings and amazingly tiny 45mm (!) hangers:
After giving everything a good cleaning, I replaced the gross, disintegrating bushings and corroded washers:
And I bought Tracker bushings because I thought they'd be the closest to fancy bushings available back then:
Then I had the idea of cleaning up the trucks further with Bull Dog brand steel wool...
... carefully polishing in circles to make sure I didn't get any scratch marks. What a difference it made! I did find out the hard way why it is highly suggested on the box to wear gloves when working with steel wool, as I nearly sliced off the tip of my finger when separating a ball of steel wool into two pieces. OUCH! My finger hurts as I type this. Beware the steel wool, I say!
Still, it was worth it. Here is a polished baseplate and one cleaned only with water. Nice, huh?
Notice something different about the baseplates? Mmmhmmmmmm... More on them later.
Because I like my skate equipment fancy, I replaced some of the corroded hardware with new stuff that I puchased at the local hardware store but learned the hard way when I got home that sizes vary slightly and it is easier to get this stuff at a skate shop. Some stuff fit but I still need to replace the bolts and axle nuts.
Because I began with two Makaha boards, I had a choice of two hangers to work with:
Notice how this small hanger is threaded all the way, whereas the one pictured above with a ruler isn't. Strange.
I chose to install the wider Makaha III 75mm hangers, but will be checking out the narrower ones soon just for fun. It is unclear which board came with which hangers and I suspect they were switched around at some point (the decks were originally owned by a brother and sister) because the wider hangers were on the narrower orange deck and the narrower ones were on the wider yellow deck.
I was pleased to realize that the axles on these Makaha trucks are 8mm just like on new trucks which means I can put most present-day wheels on this banana board which is way cool.
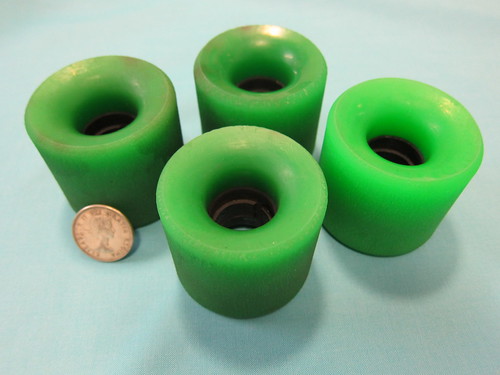
The Makaha 2 green urethane wheels are tiny, measuring only 45 mm and have closed bearings built-in (which is an upgrade from the clay wheels I had as a kid with their nasty open bearings). Cool to look at, but they are really slow to ride because the built-in bearings are a little wobbly and the wheels are very soft. Still pretty cool to get a feel for the urethane that people used to ride THIRTY years ago. I have an extra set of four of these wheels (see photo below) that I *might* be willing to part with if you are a tweaker and would give them a loving home on your own banana board. I bury this fact in this long post because I wanna make sure that only a crazy board-builder/skate fetishist/collector type would read it. Who else would actually read such a long post? These wheels are not really meant for riding anyway. Wobbly.
So cute! They remind me of tiny little ABEC Flashbacks.
So... in the end, I have a gorgeous popscicle orange banana board in my quiver now, a board with a kicktail (woo-hoo!) which my first skateboard did not have.
Notice how the baseplates allow you to shorten or lengthen the wheelbase. Interesting!
If you are thinking of getting a set of trucks off a banana board, note that they are drilled "no-school" - a term I made up meaning neither old-school nor new school - so you would need to drill more holes on your deck to install them, or build your own deck from scratch.
Here is a photo of my orange popsicles, in varying sizes, just to make you laugh.

I <3 SKATEBOARDS.
Ponyta

THIS BANANA BOARD FOUND A HAPPY NEW HOME IN FEB 2015.
P.S. Here's a photo of yer old school grip, built into the deck! LOL
I think black grip tape only came along later in the early eighties, but I may be wrong. That's when I began seeing it in sporting stores.
My deck is 22 inches long. Many of these decks had no visible brand.
By the way, I also took a sanding sponge with fine grit to the sides of the deck and smoothed down the rough edges which makes it nicer to carry.
Okay. I need to go get a life now. Or at least get some sleep.
Doesn't it seem like everything was orange in the 70's?
Important note on working with steel wool:
Polishing with steel wool creates a million little bits of steel which will fall to your workbench/floor. These nasty leftovers can get under your skin and really hurt.
Pick them up with a vaccuum cleaner or, better still as I found out by coincidence, with a screwdriver with a magnetic tip!
Keep your old toothbrushes!
I am refurbishing a few boards and must add that OLD TOOTHBRUSHES are so handy when attempting to remove 30 year-old grime and dirt from small metal parts!
After my first banana board restoration, I was hooked! So I looked for old banana boards and managed to find a few...
THE BACK STORY...
The next two vintage decks were both in TERRIBLE shape when I first got my hands on them.
In fact, I thought I paid too much when I realized that I couldn't take the trucks or mounting bolts apart due to really bad corrosion and rust. It was also apparent that previous owners had tried to do the same - one kingpin was actually a little crooked. I searched the internet and came across some great info on the Art of Skateboarding website, i.e. that dunking the whole truck in a bucket full of malt vinegar (!) for several hours might help pry metal parts apart. It took patience and determination, but eventually it worked and the king pins budged and I was able to take the trucks apart. I also had to saw off a few truck bolts!
CLASSIC YELLOW BANANA BOARD
with red wheels
Vintage plastic deck and vintage trucks (after lots of polishing)
Truck before restoration
Baseplates before and after polishing with SOS pads
Closeup on front truck
Closeup on back truck - notice NOS old-school yellow pivot cups purchased on ebay
Vintage 55mm urethane wheels with "Made in Canada" inscription
Vintage "caged" bearings - I'd never seen these before
Oval grip tape added for performance and style!
Also: All-new king pins & lock nuts, truck bolts & nuts, axle nuts and speed rings.
THIS BANANA BOARD HAS FOUND A HAPPY NEW HOME.
RED STONE FIBERGLASS
BANANA BOARD
w/gorgeous amber wheels!
Vintage Red Stone fiberglass deck
Vintage black trucks with 45mm urethane wheels - these are slow!
NOS old school bushing cup, new school bushing cup
and new orange Khiro bushings for performance and style! Hahaha...
The metal cups that were holding the loose ball bearings were popped out
and new Mini logo precision bearings were installed with bearing spacers
NOS old school amber pivot cups purchased on ebay
Also: All new king pins & lock nuts, truck bolts & nuts, black axle nuts and speed rings.
THIS BANANA BOARD FOUND IT'S FOREVER HOME IN FEB 2015.
Question: What does a grrrl do on sad, rainy days?
Answer: Tinker with skateboards.
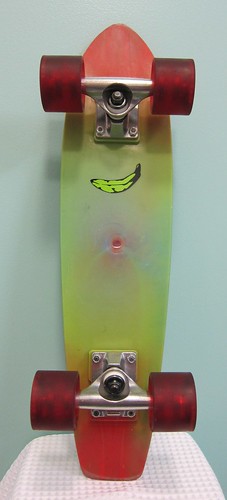
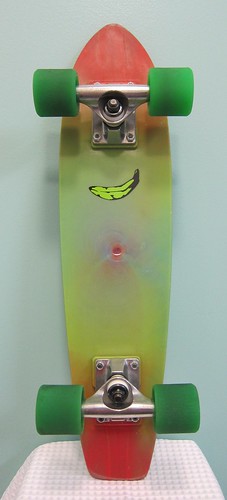
SO YOU WANNA BE A STAR SKATER?
This is my latest banana board project. It's been many months in the making.
When I first came across this deck, it had good wheels and bad wheels.
I tossed out the bad and used the good to experiment and find out
if it was possible to transform a wheel with loose ball bearings into
a wheel with precision bearings. I had nothing to lose.
Conclusion?!?
It can be done... sometimes... depending on the wheel.
Instructions: Pop out the metal cups that hold the loose ball bearings in place and install the precision bearings along with the all-important spacers. For that lesson alone, I am so grateful to this little banana board.
I did this mod to two of my other banana boards (Makaha and Red Stone).
Of course, I still had to find a full set of wheels for this puppy.
I didn't get around to finishing this "STAR" deck in time for SWAP MEET, but now I am glad because after finishing up this deck on the weekend, I went riding in my neighbourhood and it was a great old school timewarp. So it will remain in my quiver!
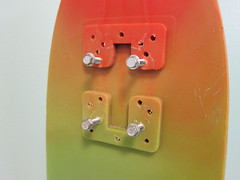
I bought a set of no-name mini trucks when I was down in Miami Beach and was unsure how to go about mounting them onto the deck.
As you can see, the deck was pre-drilled for many options.
Unfortunately, the new school holes were a little off. What to do?
I decided to forget the hexagonal screws and drill right through the deck.
Now we were definitely leaving restoration and going into "mod" territory.
For this, I called Ted and Norah at ROAROCKIT.
I was invited to drop by for a visit and Ted took care of it for me. He drilled the two first holes, bolted the truck in place, and then drilled the two other holes using the truck holes as a guide. It worked like a charm. Many thanks for your generosity, Ted and Norah!!!
Next question was what kind of wheels I was going to put on it.
I tried a set of Gumballs lathed down to 50mm by Hev.
Looked pretty good...
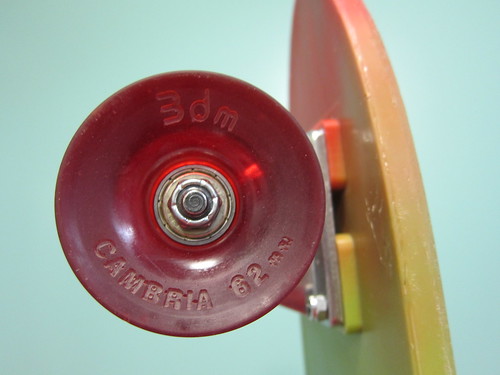
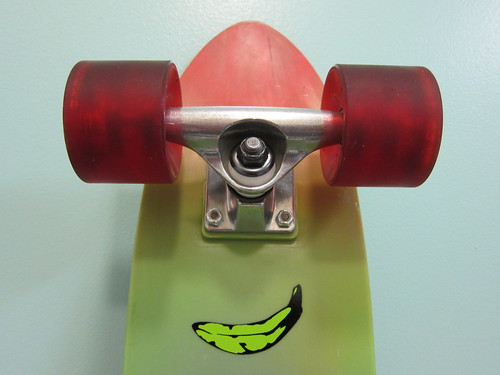
... but it was a little too slow when I rode it, so I bought a used set of 3dm Cambria 62mm wheels from Nakedlongboarder...
... swapped out the cheap hard plastic bushings for soft Thunder bushings AND... found that it rode like a charm.
Couldn't resist jamming the culture and adding a Green Banana Co. sticker which I carefully cut out.
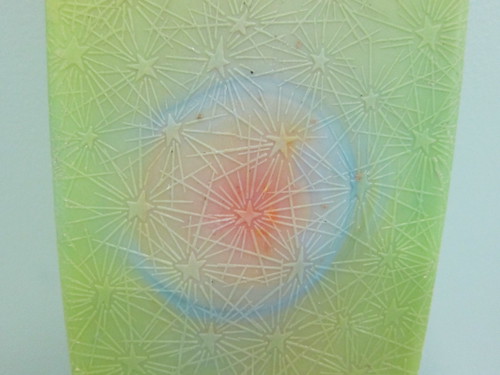
You gotta love the stars that act as grip!
I gots one more banana board I am working on. Stay tuned...
Thanks for all the kudos, everyone! This work is actually very therapeutic for me.
Some people knit. Others do yoga. I tinker with skateboards.
MANY MORE PHOTOS:
www.flickr.com/photos/ponyta/sets/7215762637619
A blue wave has taken ahold of my soul. I must ride it out...
BLUE WAVE
This is my latest banana board project. Not a restoration per se, but more of a re-thinking.
Like the last one, it was several months in the making.
When I first got my hands on this skateboard, it was in nice condition.
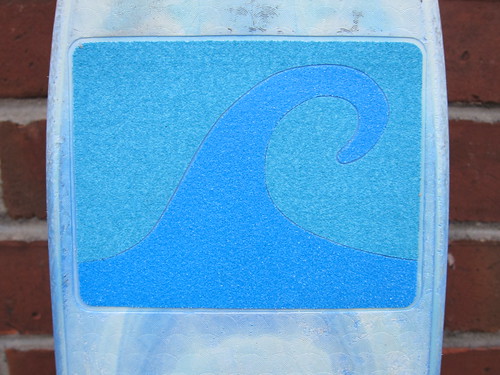
It featured the mysterious remnants of a sticker on top. Took my eyes a long while to fill in the gaps and figure out what it used to read.
Can YOU make it out?
(The answer can be found at the bottom of this post.)
Funny how so many of these old banana boards featured stickers placed right exactly where skaters put their front foot! No wonder few of these boards can be found with the original stickers intact. Ridiculous...
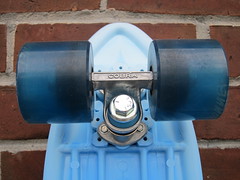
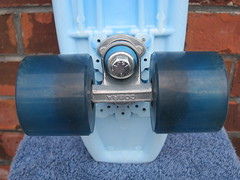
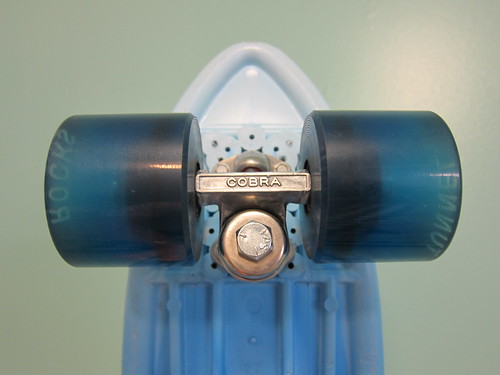
Notice anything strange about this truck?
When I took the trucks apart, I was surprised to find there were no axles. Instead of an axle, each truck had a long bolt going all the way through.
I bought old axles from a Silverfish skater/collector and tried to install them in place of the bolts, but was unsuccessful. The axles were a tad too wide.
So I "borrowed" these Cobra trucks off the Star banana board (on which I ended up installing new mini trucks - see my previous post).
Of course, I polished up the trucks with SOS pads to make them shine (HOURS and HOURS) and the old hardware was all swapped out for shiny new hardware.
I decided to keep the tiny hexagonal screws holding the trucks in place.
Drilling through the deck would have meant the holes would've ended up where the sticker was, and I did not want to ruin the look of the deck.
Besides, I had plans to create some cool custom grip for that space!
Next, I posted a "Blue Grip Tape Wanted" thread in OLF's Buy/Sell/Trade and two people saved the day: boomboom and The Karama Kidd.
Suddenly, I had two different shades of blue. What to do?!?
Next question was what kind of wheels I was going to put on it.
That was the easiest part. In keeping with the blue theme...
... I chose a set of blue 63mm Tunnel Rocks which I already owned and topped the whole thing off with blue Tracker top bushings bought off ebay.
This cryptic info on the deck is probably meant to offer insight on who made the board and when. I guess 1977 is the year it was made.
Last week, I got my hands on another banana board.
So stay tuned to this channel...
* ANSWER: NORTH STAR 77
P.S. I'm guessing it was made in Canada. The other clue is that the red wheels that
were originally on the board when I got it had "Made in Canada" written on them
and the trucks were attached with Robertson screws - a Canadian invention.
boomboom said:
the letters above the 77 are the letters of all the months
Ahhh... and I thought some guy called JASON had something to do with it. ;D
That makes sense now. I bet the months were on a dial that could turn.
My guess is the production date was September 1977, the S being on the mark at top.
THIS BANANA BOARD FOUND A HAPPY NEW HOME IN FEB 2015.
HOW DO YOU DO A RESTORATION?
You will need time, patience and the right tools!
The first thing I need to know is when you write about the screws, I am assuming you mean the four bolts that go right through the plastic deck and hold the truck in place with four nuts (see my Red Stone banana board as an example), right?
Or do you mean the little screws that hold the truck in place by fastening it to the plastic deck (see Blue Wave banana board)?
I am going to assume we are talking about bolts. To do the job, you will want to use locking plyers*, a Phillips head screwdriver (assuming the bolts have an X on top) and a little hacksaw that cuts through metal (you can get one for about $6 at any hardware store).
Clamp the plyers onto a rusty nut. Put the screwdriver into the head of the bolt to hold it in place and then turn the plyers counter-clockwise.
You will find that:
- the nut will break off because it is so rusty,
- or you can turn the nut a little and then simply remove it with your fingers,
- or you can turn the nut a little, but then it won't budge.
If you can turn it even a little, you now have clearance to access the bolt and cut it with a hacksaw. Be patient. This will take at least 15 to 20 minutes of sawing. Once it is cut, poke the rest of the bolt out with a nail. Do this to all bolts until you can remove both trucks.
Now the KINGPIN... this is harder. If you find you cannot turn it at all, then I suggest you dunk the truck in a bucket of MALT VINEGAR. I learned this method by reading a post on the Art Of Skateboarding website. After a few hours, the vinegar eats away at the rust and the kingpin may begin to loosen. Fasten the truck back onto the deck (with new hardware), as this will make it easier to remove the kingpin because you'll have the deck to hold onto. With a bit of muscle, you should be able to take it out. Do this with real tools, not a skate tool. Real wrenches will give you more torque.
If the kingpin still won't budge, then I have another system, but it is more complicated, so try this first and get back to me. Alternately, I am willing to help you out in person, if you prefer.
Once you have taken everything apart, you can clean everything up, polish up the trucks with SOS pads, install new kingpins (make sure you buy the right thread that will fit in baseplate), install modern day bushings and turn your banana board into a shiny little hotrod.
Most importantly, HAVE FUN!
This one is an ode to a bright and happy future...
SMILE!
Bought this board on my birthday for 40 buckaroos which is more than I've paid for any banana board so far.
I was inspired by the bright tie-dye colours and really needed the positive vibes.
When I began restoring it, I found out the trucks were completely seized up.
So I took them off the deck and dunked them in a bucket of malt vinegar which eventually helped loosen them enough for me to take everything apart. I am sure the seller would be quite surprised that I was able to salvage it. It was obvious that he had tried in vain...
Here are the other steps I went through to restore it:
- washed the deck with a thick bristled brush
- scraped the edge of the deck lightly with a sharp blade to remove nicks and dirt
- lightly sanded the edge of deck with fine sandpaper
- polished both trucks with SOS pads to restore shine
- polished bottom bushing cups
- replaced top bushing cups with washers
- replaced the old kingpins and nuts with a shiny new Khiro set
- gave the bushings and wheels a good scrubbing to remove dirt and grime
- removed loose ball bearings and installed new Mini Logo sealed bearings
- installed bearing spacers and speed rings
- created custom smiley face grip tape for fun and functionality!
Please note that the photos don't quite capture how bright the deck's colours are.
Deck before and after:
Front truck before restoration:
Front truck after polishing and with new hardware:
Back truck before restoration:
Back truck after polishing and with new hardware:
Custom smiley face grip tape:
Wheel before with open bearings:
Wheel after with sealed bearings:
^ Notice the cute little bicycles on the edge of the wheel - weird, eh?
THIS BANANA BOARD HAS FOUND A HAPPY NEW HOME.